Basic Melee Guide
Every PMC should have a grasp of melee combat. It's true that in the ideal situation you'll be equipped with a wide variety of weaponry that spits discomfort and death from long range. However as public enemies of the Ancap society, you'll often have to scrap by with less-than ideal circumstances. Or maybe you just like to get up-close and personal with the enemy before you do them in. Either way the concepts discussed here will help you out.
Advantages of Melee
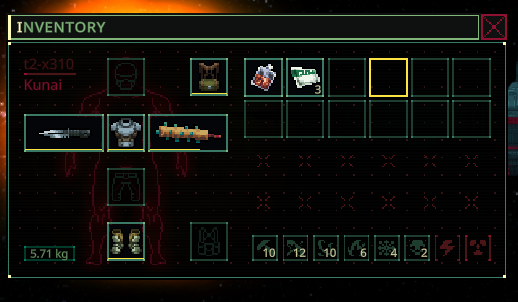
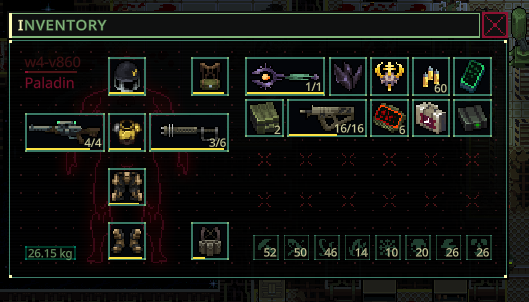
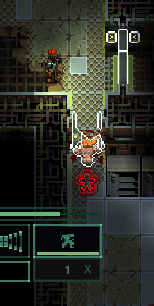
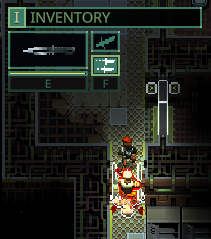
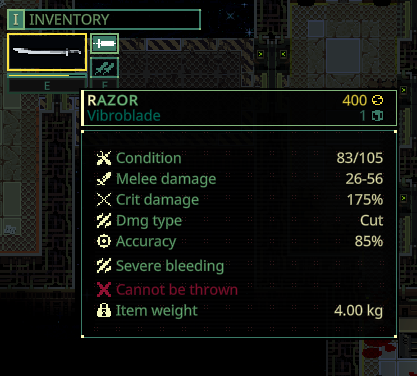
Because you can leverage your clone's physical strength in addition to the physical structure of the weapon, the total damage of a melee weapon is often a bit higher than tech-level equivalent guns. A knife does more damage in one attack than a pistol, and a axe more than an equivalent assault rifle. This increase in damage can make a huge difference in overcoming enemy armor, and inflicting debilitating wounds on the enemy. Additionally, melee weapons only lose durability when they hit, which makes them slightly more durable than guns. Lastly melee weapons are quite common. Even if they wear out, or if you lose them, they're usually easily replaced. This also means you're often free to throw them out at the end of a mission and evac with rare guns. Claw and Metal Pipes are easy to find. Vermindeath, less so. Further, if you feel like being a pirate more than a mercenary, most melee weapons don't require ammo, which will save you some inventory slots. Here's an example of what I went into a mission with and what I came out with*:
- Sharp eyes will note these are different clones. I did die a few times in the process of making this guide, but my initial load out was always roughly what you see on the left.
Weaknesses of Melee
For the most part you're lacking in ranged attacks which makes engaging groups of gun-toting enemies a challenge. You need to use doors and cover to your advantage. You can throw your weapons, but that's best done when the fight is almost done, or specific circumstances arise that make it worth it. Often you will have a short window to kill the enemy, so a single mistake in your action sequence can be debilitating or deadly. In that sense it's a higher-stress play style. You will die sometimes. Try to uses the cheaper base-cost of melee equipment to your advantage.
Surveying the Enemy
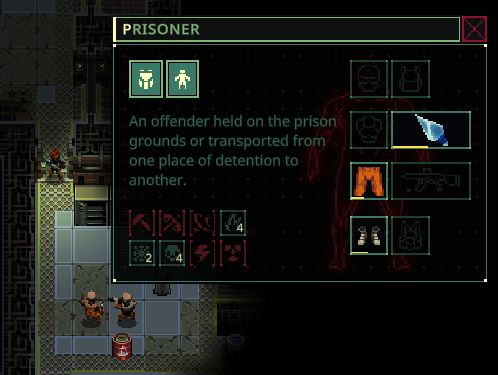
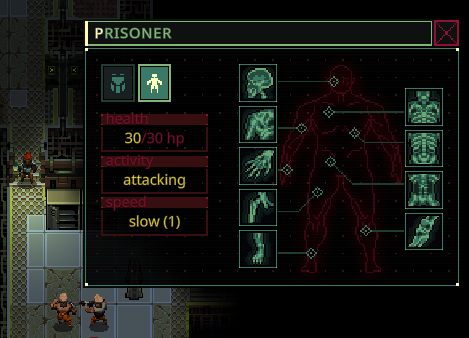
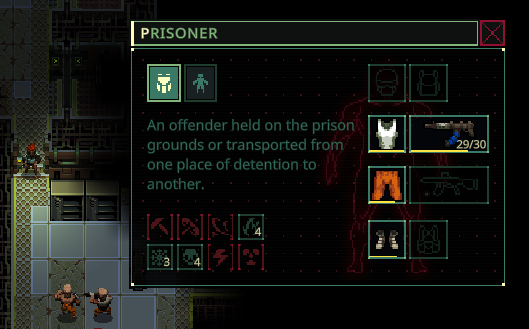
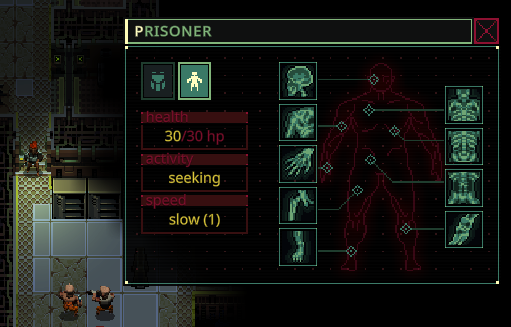
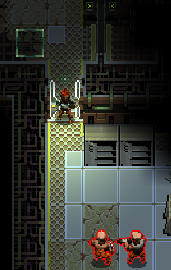
Basic target evaluation is important for combat of all kinds. All the information in the enemy's inspection window can be useful, but we want to check two things: Equipment, and AP (action points). The first thing you should do upon encountering the enemy is check those two things. Here I've encountered two Prisoners. Low tier Franche-Comte..."employees". The first is equipped with a Glass Shank and has almost no armor.
The details of armor evaluation are the topic for another guide, but as a rule of thumb, anything under 10 is generally pretty easy to get through. He's only got 1 AP. That means he's very easily kited. Once he's noticed us, he will attempt to close range and attack. If we space ourselves appropriately, he will end his turn next to us, giving us the first attack. In walk and sprint, we can attack, then move away and he will attempt to chase allowing us to repeat until he's dead. Alone, he would be an easy target. But hes got a buddy. Let's check the second prisoner out.
Same armor, but he's got an AZ-96. That probably rules out charging in. He's only got 1AP, but the gun alone is enough to force us to be cautious. We'll take them out by corner-camping.
Corner Camping
The enemy is going to move towards us, so we'll take a position just to the side of the door. Then we'll wait. They're both 1AP enemies, so it'll take a bit. We can sneak to be sure no one else is joining the party.
Once our first target is in range, we'll switch to sprint. This will allow us to move into attack range, attack and move out. If he doesn't die, he'll move foreward again allowing us to spend two AP on attacks before retreating again.
But it turns out he died in one attack. We retreat to our safe position, ensuring that we don't take any attacks from his friend with the smg. Once he's in range, we repeat, and he should go down just as easily as his buddy.
Of course not all enemies are unarmored chumps like these. Against tougher enemies with guns, we might have to consider retreating from the door entirely, or investing another part of the level and coming back with different equipment. Melee is strong, but hardly invincible.
Target Evaluation
Mid-threat Targets
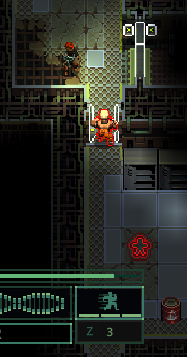
Just behind our two deceased targets, there's another Prisoner waiting for us on the other side of the door. She's got 2AP and a melee weapon. We're two tiles away, so we can wait where we are and she'll come to us.
With her low HP and armor, she goes down as easily as her colleagues, but tougher enemies with 2AP are much more threatening. Of note, if she were one tile away it's risky to close the distance, attack and retreat the way we did with the 1AP melee prisoner. With two AP she could close the gap and attack us. Depending on our armor and dodge that might not be an issue, but there's always the potential for it to be a problem so it's not worth risking knowingly.
High Threat Targets
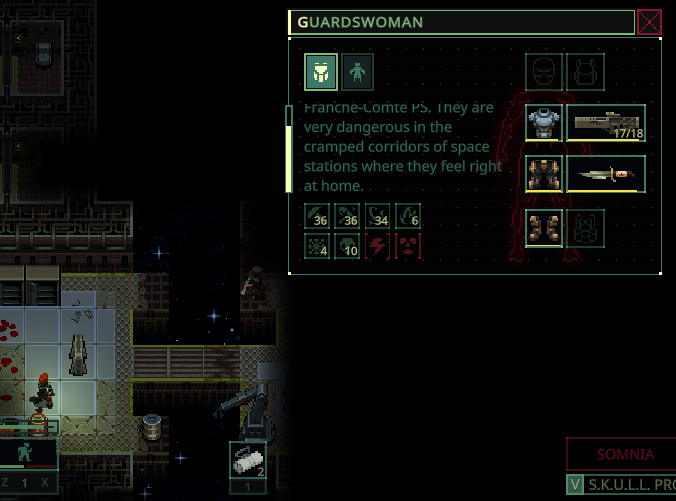
A little distance away on the level there's a much tougher enemy. Doing a quick check of the equipment, we can see the armor values are MUCH higher.
She's got an FMAF_300, a rather nice assault rifle. Another rule of thumb is if the armor value is over 30, you'd better have serious firepower or look to switch to a damage type the target is weak against. The target also has 2AP. Combined with the gun, that means that even with corner camping we've probably got to drop the target in at most 4 attack actions, possibly only two if spacing is poor. After that, we get to see how our clone fares taking two assault rifle bursts to the face. Probably not well. So let's look at our equipment to see if that's even possible.
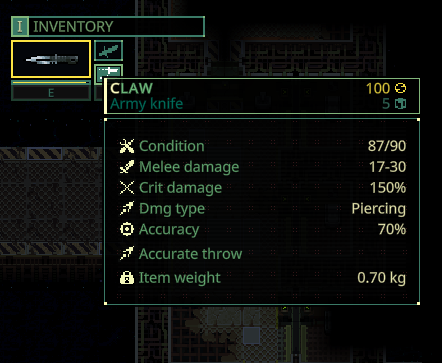
Well, our Claw isn't going to do the trick. But our OTHER knife can. With this, in roughly three hits we can take the target down. Unfortunately due to the map being so open, we really can't safely engage, so we should come back with a ranged weapon to at least get the enemy's attention. If we were near a corner her gear would be ours now.
3AP Targets
A 3AP target is a special kind of threat. They move naturally as much as you can by sprinting. That means it is impossible to expand the gap between you without an intervention of some kind. Under ideal circumstances you do the same thing you do with every other enemy. You use obstacles and positioning to ensure they end your move next to you and gut them. In the end though, it's a bit of a samurai duel. You've got one turn to kill them, and if not, they'll unload three attacks on you. At that point, you have to hope your armor is good and your dodge is at least positive.
Ultimately, when possible, it's safer to take these out from a distance, though some more advanced melee strategies can add some nuance to these encounters.
Notes on Wounds and Pain
Melee strategies have a very narrow window in which it is safe to kill enemies with ranged weapons. Armor, dodge, and health will allow you to take calculated risks as you get familiar with the game, but there will always be risks if you end your turn in attack range of an enemy. Controlling the engagement window is critical to getting in the first strike and maximizing the number of attacks. That window is determined by your AP. You've got 3AP if youre sprinting and 2 if you're walking. That gives you a fair amount of control. But things go downhill fast if something restricts your movement. The two most common ways for this to occur are pain and wounds.
Pain
Whenever you take damage, you also take a certain amount of pain. If that pain exceeds your pain threshold, you will lose an action at the start of your next turn. You will only ever lose 1AP to pain, but when you only have 2 or 3 AP, 1 is a lot. and when trying to control the space between you and an enemy with 2 or 3 AP, being at a disadvantage will cause things to spiral out of control quickly. In the case of pain the best way to handle it is to avoid taking damage in the first place. Percy Fawcett and Kenzie Yukio both have above average pain thresholds, which can help avoid losing actions. Max Rhor is immune to pain, which allows you to ignore this particular problem. If all else fails, use the almighty first-aid kit. Preferabily from cover. It's pain reduction is modest, but it will likely mitigate or fix a large number of effects trying to kill you while it is active.
Wounds
There are many types of wounds (including some that influence pain), but the most critical for our purposes are leg wounds. Wounds to the knee, foot, or leg can cause the effecct "Running unavailable". This locks you out of sprinting. Similar to pain, this equally debilitating, though somewhat less critical. It should also be noted that wounds to the upper limb will reduce melee damage, usually with 20% for each wound. So close combat with sustained arm wound is also ill advisable, espeicially when the opponent fields heavy armor. ) If you're in pain, it's likely because you've taken a large amount of damage or a large number of wounds. A leg wound can occur from a lucky hit a random worker with a basic Galand spits your way. Or stepping on a chemical pool you didn't see under a corpse you were trying to loot. Choose whatever method you'd like to treat it, from rags, to first-aid kits, to morphine if you're desperate. You'll be locked out of sprinting and the 3ap it comes with untl the wound is fully healed. Avoid engaging in combat until it is healed, or you might find yourself unable to escape from or properly engage a target with 3ap.

